


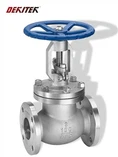

Hey there! As a supplier of Electric Actuator Gate Valves, I'm stoked to share with you a step - by - step guide on how to install an electric actuator gate valve. Whether you're a DIY enthusiast or a professional in the plumbing or industrial field, this guide will help you get the job done right.
Pre - installation Checks
Before you even start unpacking the valve, there are a few things you need to do. First off, make sure you've got the right valve for the job. Check the specifications like size, pressure rating, and material. For example, if you're dealing with high - pressure systems, you might want to consider a Stainless Steel Pressure Seal Gate Valve. It's designed to handle tough conditions.
Inspect the valve and the actuator for any visible damage during transit. Look for dents, scratches, or loose parts. If you find anything, contact your supplier right away. Also, check the power requirements of the electric actuator. Make sure your power source can handle it. You don't want to fry the actuator on the first try!
Tools You'll Need
To install the electric actuator gate valve, you'll need a few basic tools. A set of wrenches is a must. You'll use them to tighten the bolts and nuts. A screwdriver might come in handy for adjusting some of the smaller components of the actuator. A tape measure is essential for ensuring proper alignment. And don't forget safety gear like gloves and safety glasses. You're working with heavy equipment, so better be safe than sorry.
Mounting the Valve
The first step in the installation process is mounting the gate valve itself. Start by cleaning the pipe ends where the valve will be installed. Remove any dirt, debris, or old sealant. This will ensure a good seal.
Place the valve between the pipe flanges. Make sure the valve is centered and aligned properly. You can use the tape measure to double - check. Once it's in place, insert the bolts through the flange holes. Don't tighten them all the way just yet. You'll want to make some final adjustments before fully securing the valve.
Installing the Electric Actuator
Now, it's time to install the electric actuator on the gate valve. Most actuators come with a mounting bracket. Align the bracket with the valve stem and the actuator. Use the bolts provided to attach the actuator to the valve. Make sure the connection is tight. You don't want the actuator to wiggle around during operation.


After mounting the actuator, connect the power cables. Follow the wiring diagram that came with the actuator. It's usually pretty straightforward, but if you're not sure, it's a good idea to consult an electrician. Once the cables are connected, test the power to make sure the actuator is getting electricity.
Calibration
Calibration is a crucial step in the installation process. It ensures that the actuator opens and closes the gate valve correctly. Most actuators have a calibration mode. Refer to the user manual to enter this mode.
Start by setting the open and close limits. This tells the actuator how far to open and close the valve. You can do this by adjusting the limit switches on the actuator. Slowly operate the actuator to open and close the valve a few times. Make fine - tuning adjustments to the limit switches until the valve opens and closes smoothly and accurately.
Testing
Once you've calibrated the actuator, it's time to test the valve. Turn on the power and operate the actuator to open and close the valve several times. Listen for any strange noises. If you hear grinding or rattling, there might be an issue with the installation. Check for leaks around the valve flanges and the actuator connections. A small leak can turn into a big problem over time.
If everything seems to be working fine, let the valve run for a longer period. Monitor the operation to make sure there are no issues with the valve's performance. You might also want to check the power consumption of the actuator. High power consumption could indicate a problem.
Maintenance Tips
After a successful installation, it's important to maintain your electric actuator gate valve. Regularly inspect the valve and the actuator for any signs of wear and tear. Lubricate the moving parts as recommended by the manufacturer. This will keep the valve operating smoothly.
Check the power cables and connections for any signs of damage. Loose or frayed cables can cause electrical problems. Also, keep the actuator clean. Dust and debris can accumulate and affect its performance.
Additional Considerations
If you're working in a harsh environment, like a chemical plant or a marine setting, you might want to consider a Stainless Steel Flexible Wedge Gate Valve or a Duplex Stainless Steel Pressure Seal Gate Valve. These valves are more resistant to corrosion and can withstand tough conditions.
Conclusion
Installing an electric actuator gate valve might seem like a daunting task, but if you follow these steps, you'll be able to do it like a pro. Remember to do your pre - installation checks, use the right tools, and take your time with calibration and testing.
If you have any questions or need more information about our Electric Actuator Gate Valves or other related products, don't hesitate to reach out. We're here to help you with all your valve needs. Whether you're looking for a replacement valve or planning a new project, we've got you covered. Contact us to start a discussion about your requirements and let's work together to find the best solution for you.
References
- Manufacturer's installation manuals for electric actuator gate valves
- Industry standards for valve installation and calibration