

Installing a cast steel pressure seal gate valve in a small - diameter pipeline requires a systematic approach and a good understanding of the valve's characteristics. As a supplier of cast steel pressure seal gate valves, I'm here to guide you through the entire installation process.
Understanding the Cast Steel Pressure Seal Gate Valve
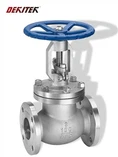
Before we start the installation, it's essential to have a clear understanding of what a cast steel pressure seal gate valve is. These valves are designed for high - pressure and high - temperature applications. The pressure seal bonnet design ensures a tight seal even under extreme pressure conditions. Cast steel is chosen for its strength, durability, and resistance to corrosion, making it suitable for a wide range of industrial applications.
You can find more information about high - pressure and high - temperature gate valves on our website: High Pressure And High Temperature Gate Valves.
Pre - installation Preparation
1. Inspection of the Valve
When you receive the cast steel pressure seal gate valve, the first step is to conduct a thorough inspection. Check for any visible damage during transportation, such as scratches, dents, or cracks on the valve body, bonnet, or gate. Inspect the sealing surfaces for smoothness and integrity. Ensure that all the bolts and nuts are present and in good condition. Also, verify that the valve's specifications match your pipeline requirements, including the diameter, pressure rating, and temperature rating.
2. Pipeline Preparation
The small - diameter pipeline where the valve will be installed needs to be properly prepared. First, clean the pipeline thoroughly to remove any dirt, debris, or welding slag that may have accumulated during the pipeline construction. Use a wire brush or a pipeline cleaning tool to ensure a clean inner surface. Check the pipeline for proper alignment. Any misalignment can cause stress on the valve during installation and may lead to leakage or premature failure. Measure the pipeline diameter accurately to ensure a proper fit with the valve.
3. Gathering Tools and Materials
You will need a set of tools for the installation, including wrenches, socket sets, a torque wrench, a pipe cutter (if necessary), and a sealant. Make sure all the tools are in good working condition and of the appropriate size for the valve and pipeline components. Additionally, gather the necessary gaskets or sealing materials recommended by the valve manufacturer.
Installation Steps
1. Positioning the Valve
Carefully place the cast steel pressure seal gate valve in the desired location on the small - diameter pipeline. Ensure that the valve is oriented correctly, with the flow direction arrow on the valve body matching the intended flow direction in the pipeline. The valve should be installed in a position that allows easy access for operation and maintenance. For example, avoid installing the valve in a cramped space where it will be difficult to reach the handwheel or perform inspections.
2. Connecting the Valve to the Pipeline
There are different methods for connecting the valve to the pipeline, depending on the type of end connections. If the valve has flanged ends, align the valve flanges with the pipeline flanges. Insert the bolts through the flange holes and hand - tighten the nuts evenly. Then, use a torque wrench to tighten the bolts to the recommended torque value specified by the valve manufacturer. This ensures a proper seal and prevents over - or under - tightening, which can lead to leakage or flange damage.
If the valve has threaded ends, apply a suitable thread sealant to the male threads of the valve or the pipeline. Carefully thread the valve onto the pipeline, turning it clockwise until it is firmly seated. Do not overtighten, as this can damage the threads.
3. Bonnet Installation
For a cast steel pressure seal gate valve, the bonnet installation is a critical step. First, clean the sealing surfaces of the valve body and the bonnet. Apply a thin layer of lubricant or anti - seize compound to the threads of the bonnet bolts. Place the bonnet on the valve body and align the bolt holes. Insert the bolts and hand - tighten the nuts. Then, use a torque wrench to tighten the nuts to the specified torque value in a criss - cross pattern. This ensures even pressure distribution and a proper seal between the valve body and the bonnet.
4. Actuator Installation (if applicable)
If your cast steel pressure seal gate valve is equipped with an actuator, such as an electric or pneumatic actuator, follow the manufacturer's instructions for installation. Mount the actuator on the valve stem and connect the necessary wiring or piping. Ensure that the actuator is properly aligned and secured to the valve. Test the actuator to make sure it operates smoothly and can open and close the valve as intended.
Post - installation Checks
1. Leakage Test
After the installation is complete, conduct a leakage test. Close the valve completely and apply pressure to the pipeline. You can use a pressure gauge to monitor the pressure. Check all the connection points, including the flanges, bonnet, and valve stem, for any signs of leakage. If you detect a leak, identify the source and tighten the bolts or nuts as necessary. If the leak persists, you may need to replace the gasket or check for other issues such as damaged sealing surfaces.
2. Valve Operation Test
Open and close the valve several times to ensure smooth operation. Check that the handwheel or actuator moves freely and that the valve fully opens and closes. Listen for any unusual noises during operation, which may indicate a problem such as a misaligned gate or a damaged internal component.
Maintenance Considerations
Regular maintenance is crucial to ensure the long - term performance of the cast steel pressure seal gate valve. Inspect the valve periodically for signs of wear, corrosion, or leakage. Lubricate the valve stem and moving parts as recommended by the manufacturer. Replace any worn or damaged components promptly.
In addition to cast steel pressure seal gate valves, we also offer other types of gate valves, such as Duplex Stainless Steel Gate Valve and Stainless Steel Flexible Wedge Gate Valve.
Conclusion
Installing a cast steel pressure seal gate valve in a small - diameter pipeline requires careful preparation, proper installation techniques, and thorough post - installation checks. By following the steps outlined in this guide, you can ensure a successful installation and reliable operation of the valve. If you have any questions or need further assistance with the installation or selection of our valves, please feel free to contact us for procurement and in - depth discussions.


References
- Valve Installation Manuals from Industry Standards
- Manufacturer's Technical Documentation for Cast Steel Pressure Seal Gate Valves