

Hey there! As a supplier of Stainless Steel Globe Valves, I've seen firsthand how crucial it is to install these valves correctly. A proper installation not only ensures the valve functions as intended but also extends its lifespan. In this blog, I'll walk you through the steps of correctly installing a Stainless Steel Globe Valve.
Step 1: Preparation
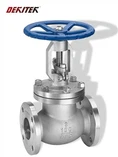
Before you start the installation process, it's essential to gather all the necessary tools and materials. You'll need a wrench, a pipe cutter, a file, and Teflon tape. Make sure you have the right size of the Stainless Steel Globe Valve for your pipeline. You can check out our Stainless Steel Globe Valve options to find the perfect fit for your needs.
Inspect the valve and the pipeline for any damage or debris. Clean the pipeline thoroughly to remove any dirt, rust, or other contaminants. This will prevent any blockages or leaks in the future. If you notice any cracks or defects in the valve or the pipeline, replace them immediately.
Step 2: Measuring and Cutting
Measure the length of the pipeline where you'll be installing the valve. Use a pipe cutter to cut the pipeline to the appropriate length. Make sure the cut is straight and clean. After cutting, use a file to smooth the edges of the pipeline to prevent any sharp edges from damaging the valve or the gasket.
Step 3: Applying Teflon Tape
Teflon tape is used to create a watertight seal between the valve and the pipeline. Wrap the Teflon tape around the male threads of the pipeline in a clockwise direction. Make sure to wrap the tape tightly and evenly. You should wrap the tape around the threads at least three to four times.
Step 4: Installing the Valve
Now it's time to install the valve. Carefully thread the valve onto the pipeline. Use a wrench to tighten the valve, but be careful not to over-tighten it. Over-tightening can damage the valve or the pipeline. Make sure the valve is straight and aligned with the pipeline.
Step 5: Testing the Installation
Once the valve is installed, it's important to test the installation to make sure there are no leaks. Turn on the water supply and check for any signs of leakage around the valve. If you notice any leaks, tighten the valve slightly using a wrench. If the leak persists, you may need to remove the valve and reapply the Teflon tape.
Step 6: Maintenance
Proper maintenance is key to ensuring the longevity of your Stainless Steel Globe Valve. Regularly inspect the valve for any signs of wear or damage. Clean the valve periodically to remove any dirt or debris. Lubricate the valve's moving parts to prevent them from seizing up.


If you're dealing with a more complex system, you might also consider other types of globe valves. For instance, Cast Steel Globe Valve offers durability and strength, while Duplex Steel Globe Valve provides excellent corrosion resistance.
Installing a Stainless Steel Globe Valve correctly is not as difficult as it may seem. By following these steps, you can ensure that your valve functions properly and lasts for a long time. If you have any questions or need further assistance with the installation process, don't hesitate to reach out.
We're here to help you with all your valve needs. Whether you're a professional plumber or a DIY enthusiast, we have the right products for you. If you're interested in purchasing our Stainless Steel Globe Valves or other valve products, feel free to get in touch for a purchase negotiation. We offer high-quality products at competitive prices, and our team of experts is always ready to assist you.
References
- ASME B16.34 - Valves - Flanged, Threaded, and Welding End
- API 602 - Compact Steel Gate, Globe, and Check Valves
- ISO 5208 - Industrial valves - Pressure testing of valves